
A while ago I posted about how I’m using Cloudflare Zero Trust Warp tunnels as the backbone for all my private networking. Any SSH connection I do to any of my devices goes through Warp and I’m all in all pretty happy with it.
Color me surprised when Cloudflare announced Mesh (currently in beta), their own mesh networking product for private connectivity between devices and services. I finally had some time to test Cloudflare Mesh in my own network and compare it directly to the Tunnels setup I’ve been running for the past year. Let’s say, it’s not at all what I expected it to be!
Quick refresher: Cloudflare Tunnels vs Tailscale
- Cloudflare Tunnels are tunnels routed through the Cloudflare network that terminate at some thing in your network. Can be a server, can be another machine, can be your router, you name it. The good thing: Everything goes through the Cloudflare network, so no issues with firewalls. The bad thing: Everything goes through the Cloudflare network, even if your other machine is next door.
- Tailscale: Direct peer-to-peer network: Any device can connect to any other device in your tailnet. Tailscale uses NAT penetration techniques to establish a direct connection between your machines. The good: No middleman, maximum speed when direct connection is possible. The bad: NAT penetration can often hit a strong firewall that makes a direct connection impossible.
Where Cloudflare Mesh fits in
Before looking into it, I just assumed Cloudflare Mesh == Tailscale but that’s not at all the case. While it is used to create a mesh network, traffic is always routed through Cloudflare’s edge rather than a direct connection between devices. Cloudflare has a good little image explaining this:
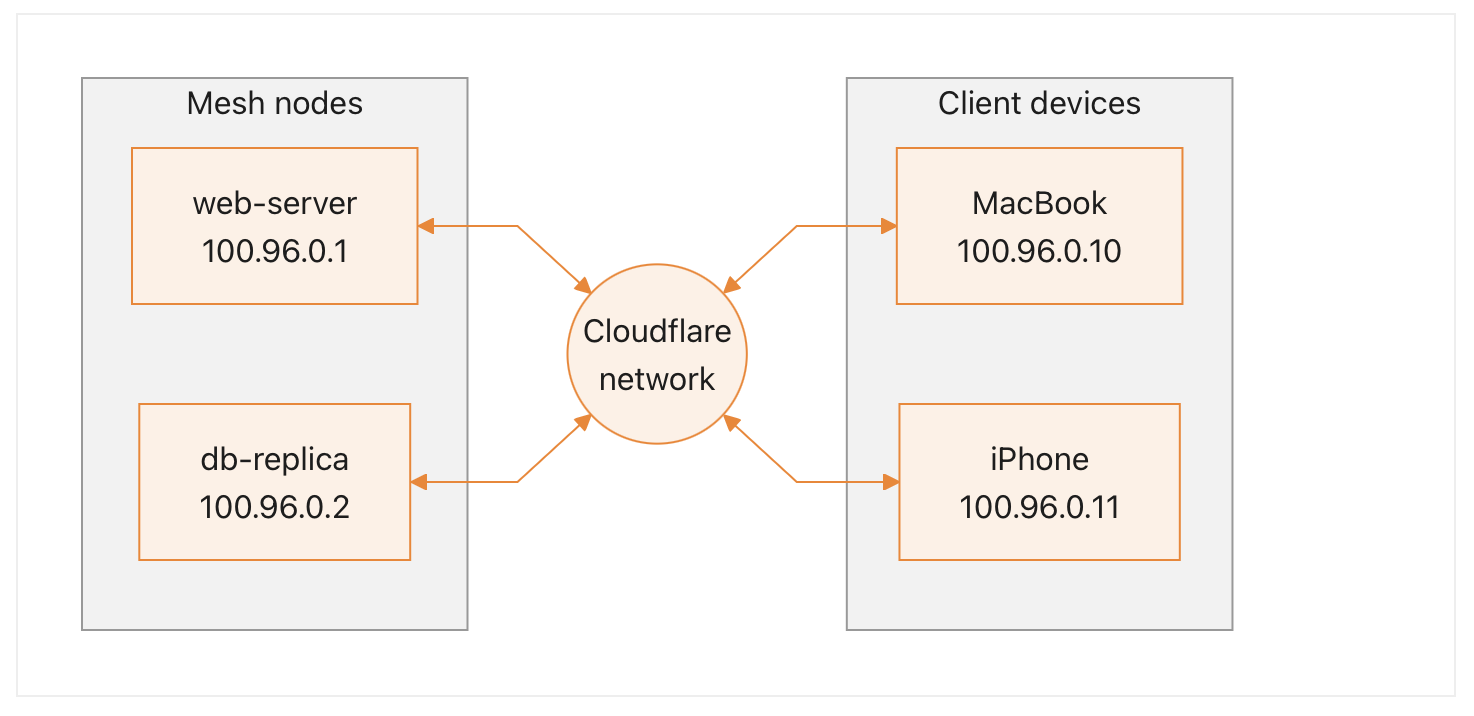
Cloudflare Mesh creates a mesh where any node can reach any other node, but it’s not a true peer-to-peer network like Tailscale. All traffic still routes through Cloudflare’s edge.
What can Cloudflare Mesh actually do?
The short answer is, it’s a simpler cloudflared that allows all nodes to talk to each other: My MacBook can ping my server that’s running a mesh node, but my server can also ping my MacBook that’s running the Warp client.
Any node within the mesh network can talk to any other node, the only caveat here is: Everything goes through the Cloudflare network.
The good: We get the benefits of cloudflared: No firewall issues as no direct connection is being established, it always hops through the Cloudflare edge network.
The bad: Well as you might have guessed, we also don’t get the benefits of a direct device-to-device connection. Each request, even from my MacBook to my iPhone, goes through the Cloudflare edge network.
Mesh vs Cloudflared
Cloudflare has this little comparison on their website:
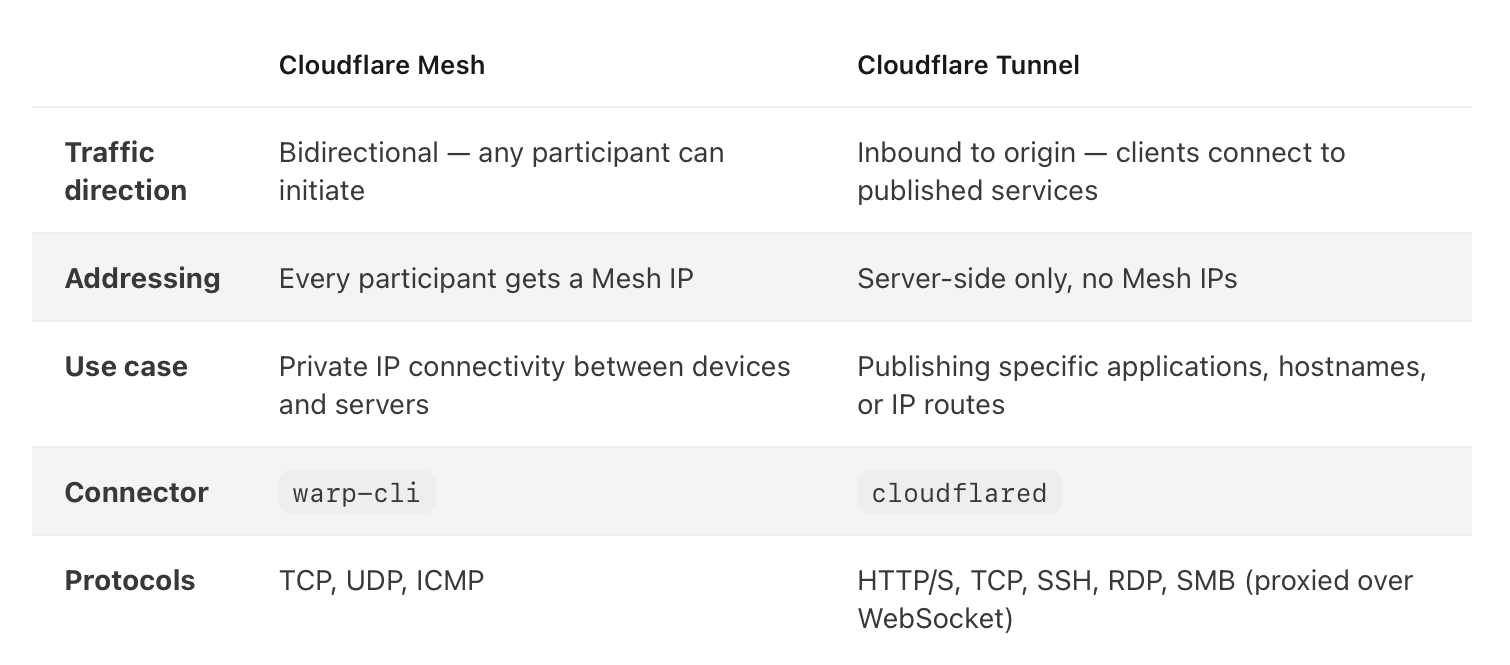
But the gist is:
- Cloudflared: UNIDIRECTIONAL, you have a tunnel that terminates somewhere and stuff can connect to it. I can have a tunnel on my server, then routes to that tunnel to expose for example Home Assistant, a web server, an SSH server or whatever I want through that tunnel. Machines running
cloudflaredcan only receive traffic but not connect to other nodes on the network. - Mesh: BIDIRECTIONAL, I can do very similar things as with cloudflared: I can have a mesh node on my server, then run
http://<mesh-ip>:8080to expose whatever is running on port 8080 on that machine to my network. I can also use mesh to connect through SSH to that machine. Machines running mesh can receive and send traffic to any other node on the network. So my router could talk to my other servers, my iPhone or my MacBook.
What both can do:
Expose ports on the target machine to other stuff in your network
Route traffic to your network: Both can be set up with routes (for example
192.168.1.1/24) through a node, so that eithercloudflaredormeshcan be used as a gateway to some network infra. If you want to expose your router, or your printer or whatever through a node.Map private IPs to internal infra
What cloudflared can do that mesh can’t do:
- Define in detail what traffic that arrives at the tunnel gets forwarded to where
- Hostname mapping to route
homeassistant.mydomain.comto localhost:8080 (getting rid of the port) - Publish stuff publicly to the internet, not just Zero Trust network. I can have 192.168.1.1 (my router) available through a tunnel if I wanted to do that.
- Define your own routes and IPs and assign them manually to each service. I am using
10.128.0.1/24for example.
What mesh can do that cloudflared can’t do:
- Let every node initiate connections to every other node, while still routing through Cloudflare’s edge
Let’s add a mesh node and connect to it!
The Mesh admin interface can be accessed under Networking -> Mesh. In contrast to Tailscale, mesh nodes are created explicitly in the Cloudflare dashboard instead of appearing automatically when you authenticate a new machine.
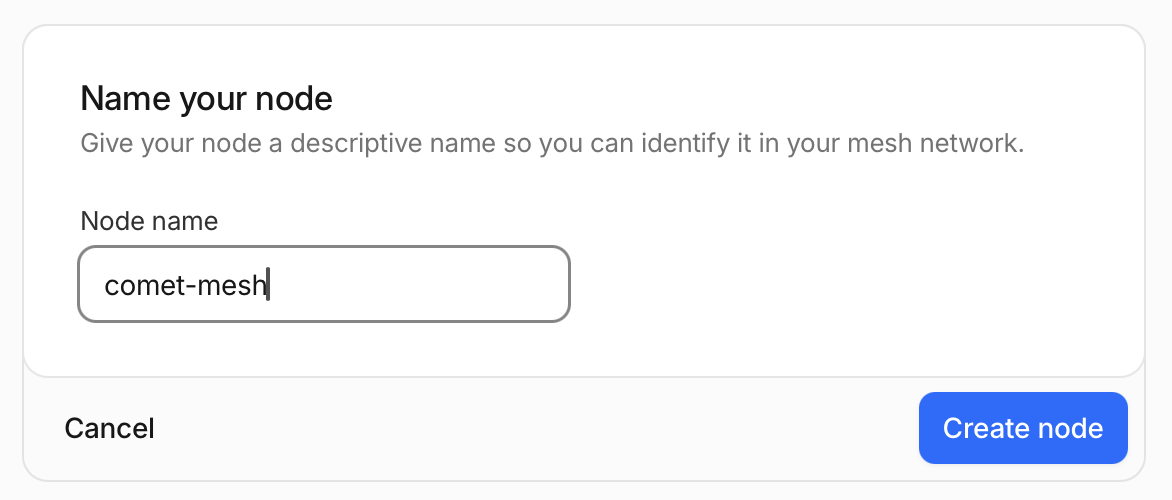
To connect new nodes (aka servers and services) to the mesh network, we need to add a new node in the admin interface. It’s a more manual flow than Tailscale, where nodes get automatically added to your tailnet when you provision them.
To connect a new client device (aka MacBook or iPhone) to the mesh network, we need to download the Zero Trust client on the respective device.
Adding a new node gives us very clear install instructions:
Then do:
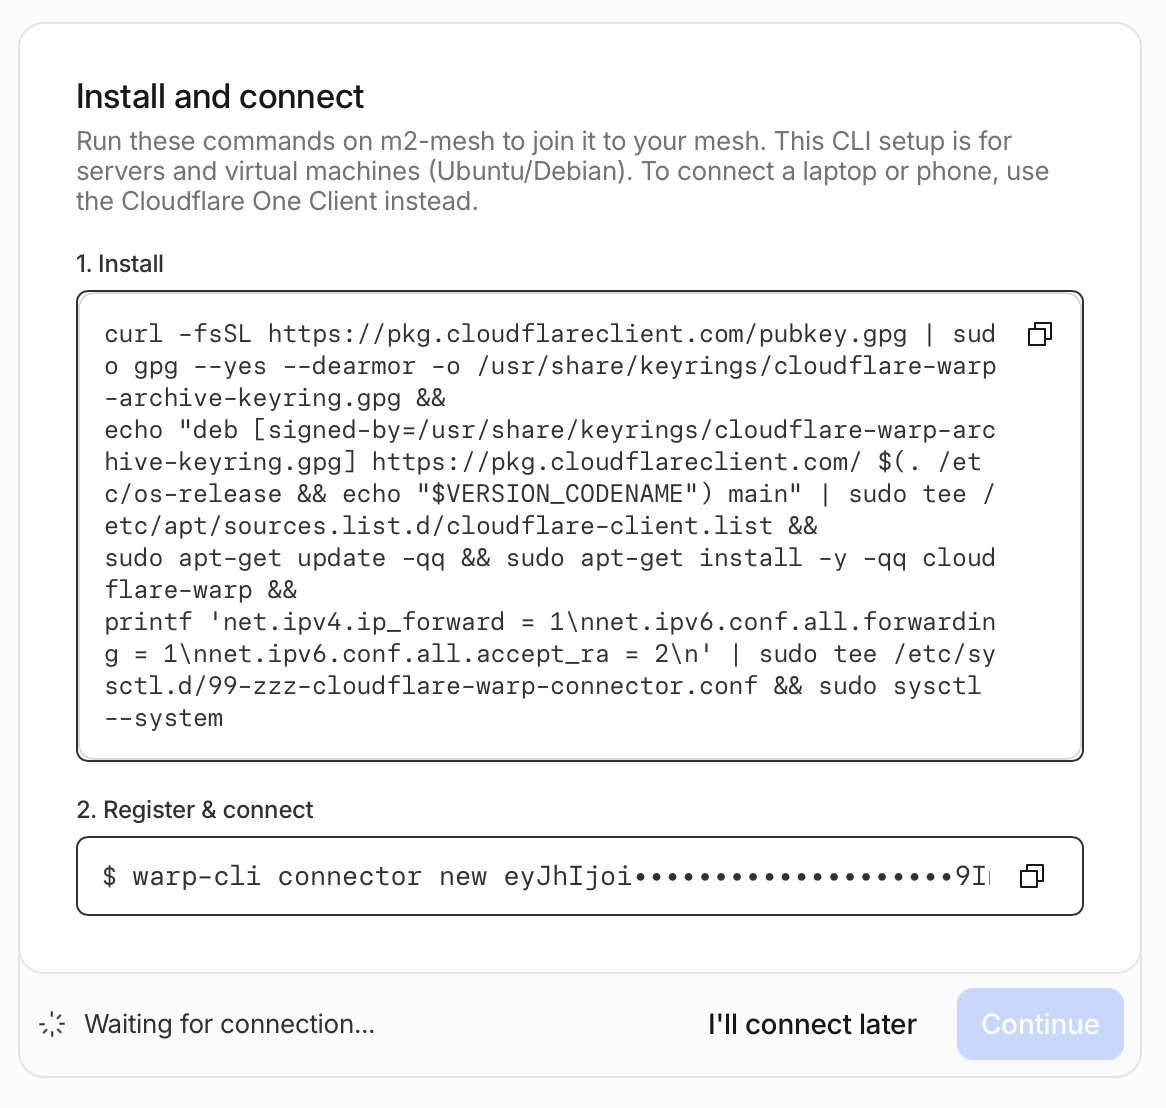
So
- Install the warp client
- Run that connector command (careful about this step, if you start the warp client without connector command, it will attempt to be your VPN to handle all your traffic. I managed to lock myself out of my server with this in the past)
Once we’ve done that, the new node will show up together with its private IP
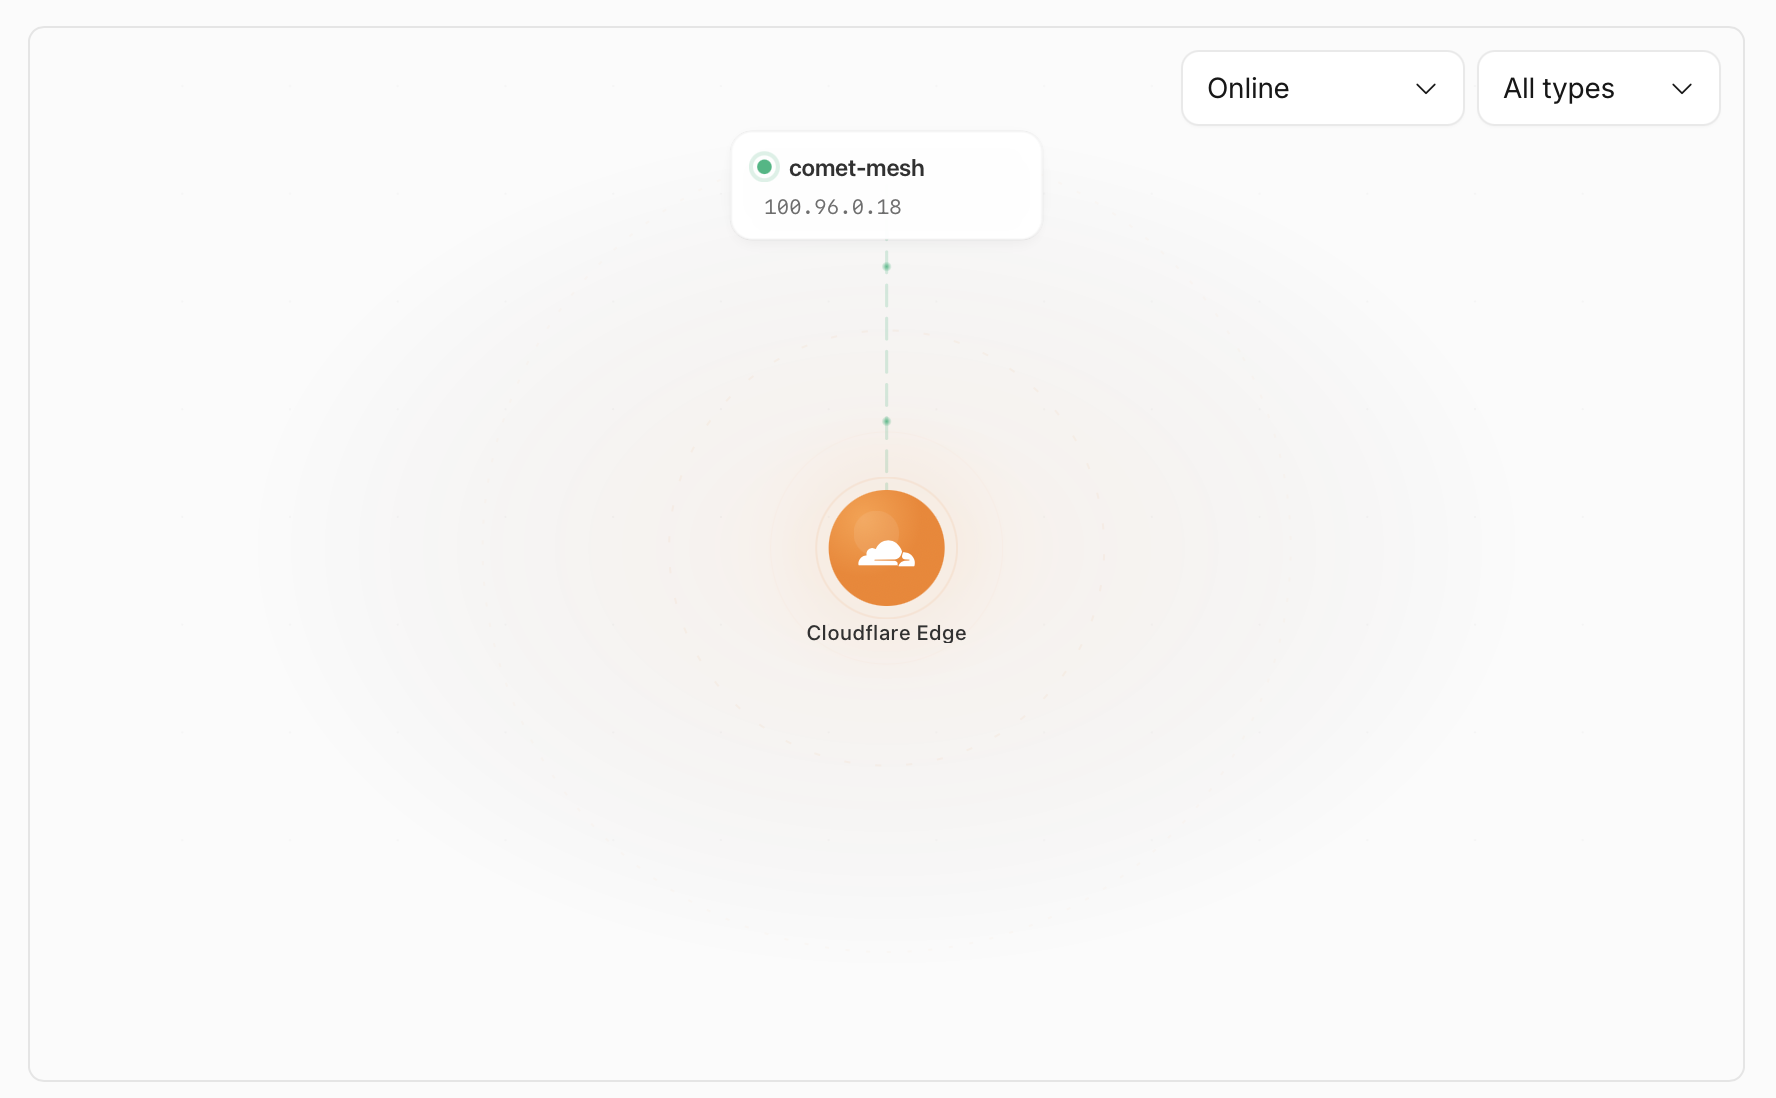
For this device, the private IP for the mesh network is 100.96.0.18

To connect to this, we have to install and start the Zero Trust / Warp client on our MacBook. This is the same thing that we already use to connect to the Zero Trust network, so if you did anything with Zero Trust you have that already installed. Connecting it, and:
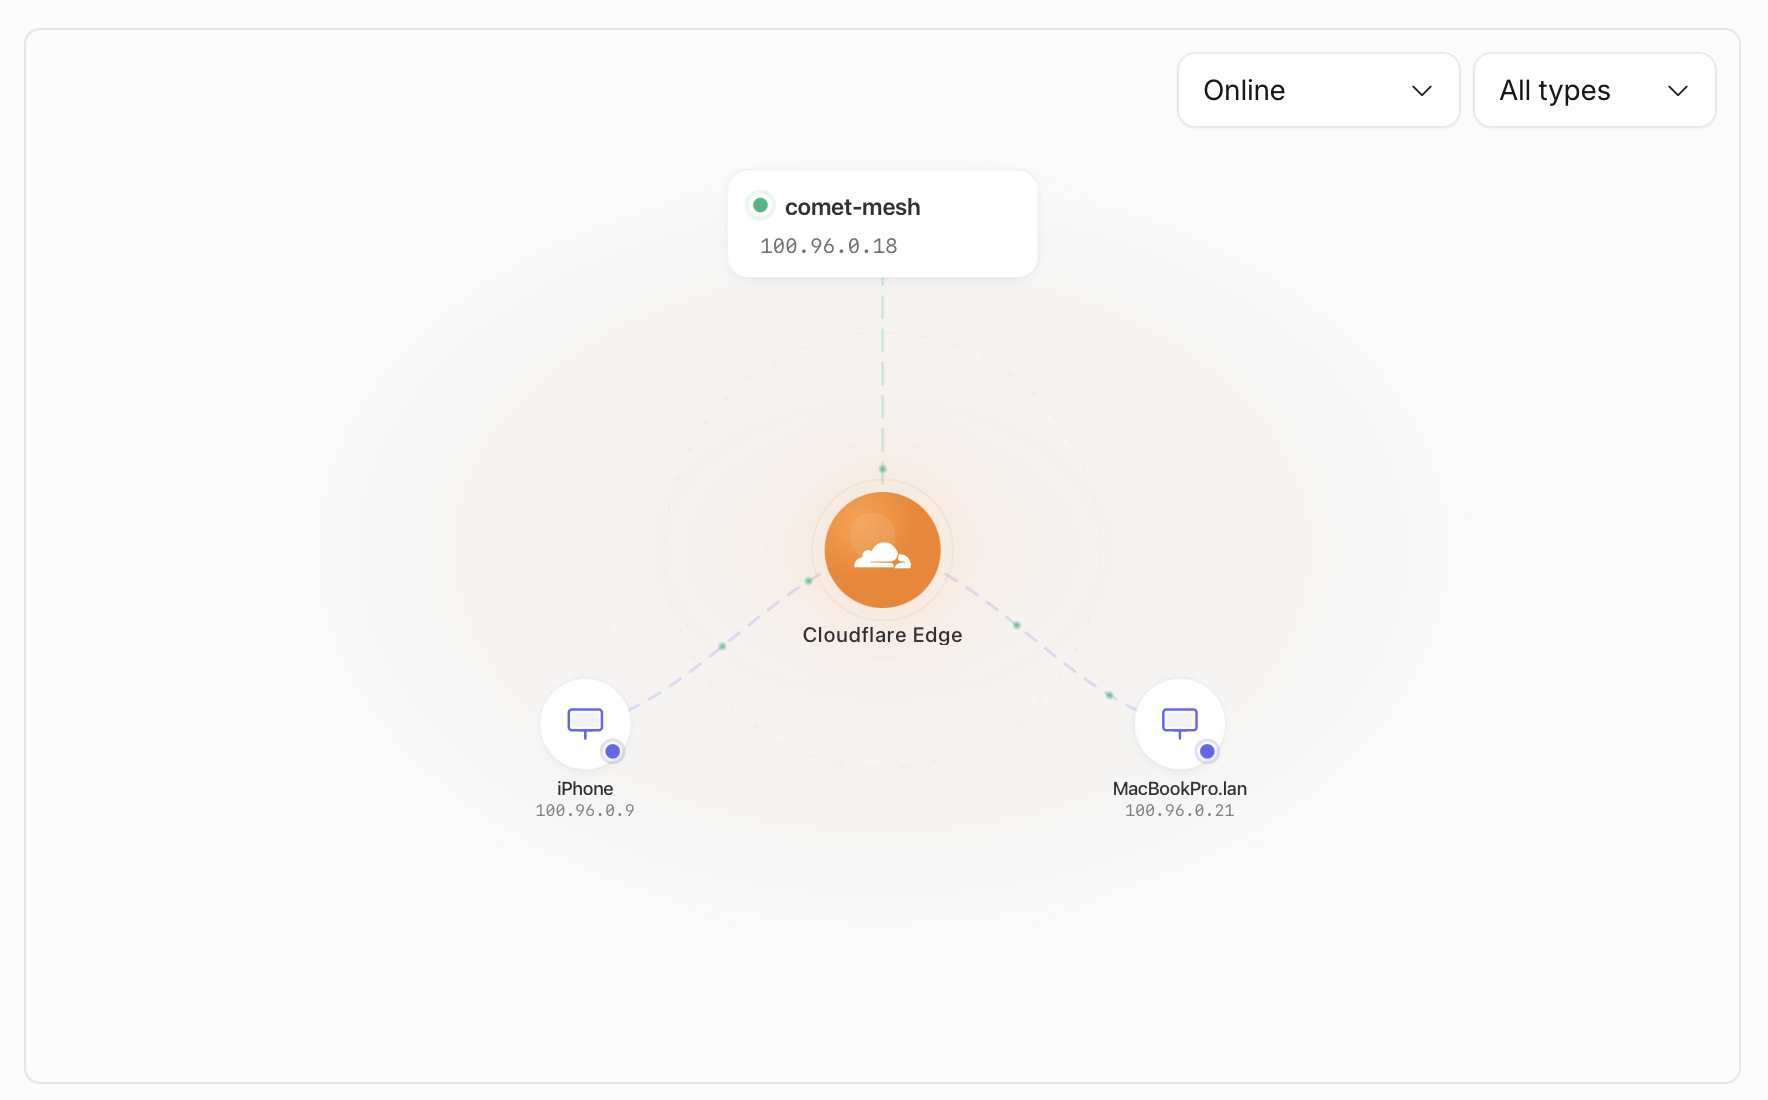
tadaa! The devices show up. 🎉
Cloudflare is doing a great job showing you also very clearly that everything is going through the Cloudflare Edge network! There’s no line directly connecting 2 nodes, so you don’t get the wrong impression that this is a direct device-to-device link.
Can we reach this new mesh node from my MacBook?

we sure can! How about the other way around, from my server to my MacBook?
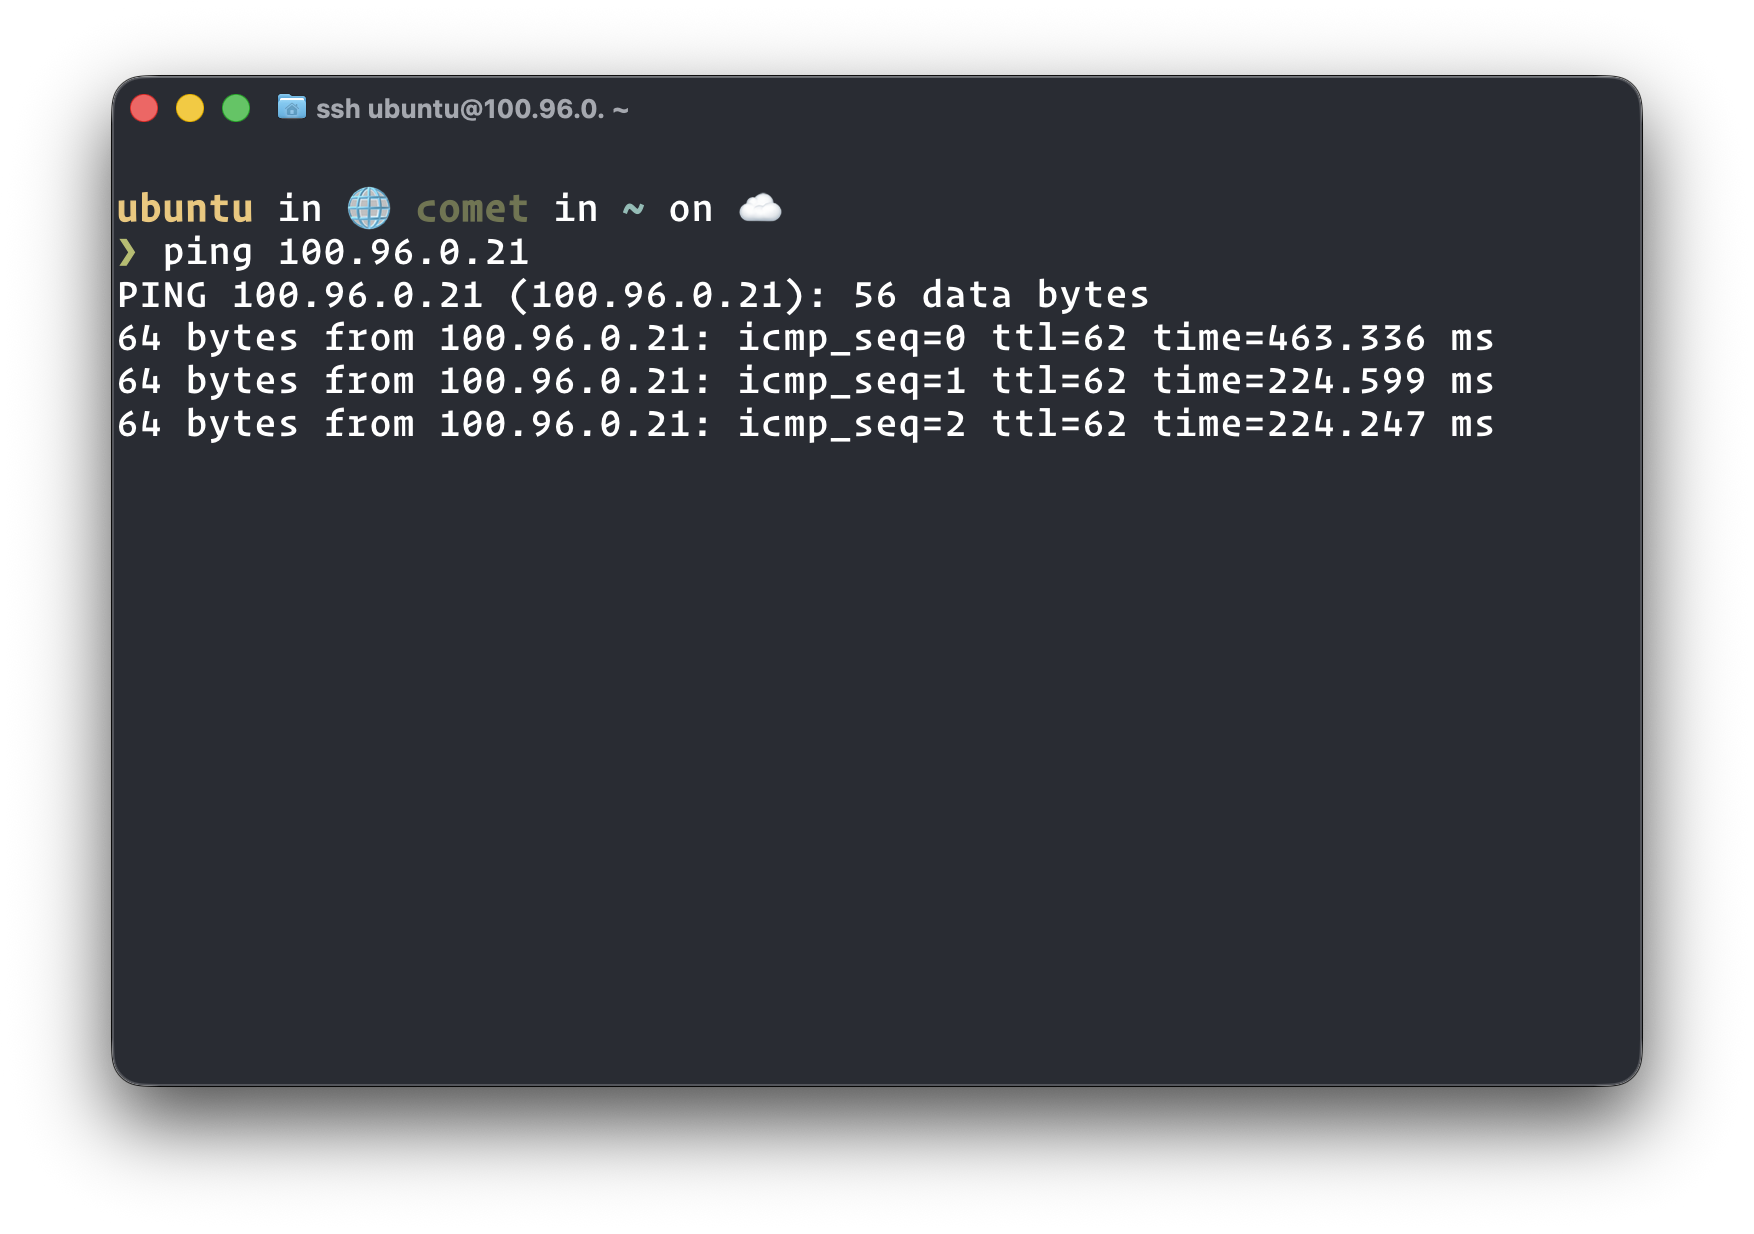
How about ssh?
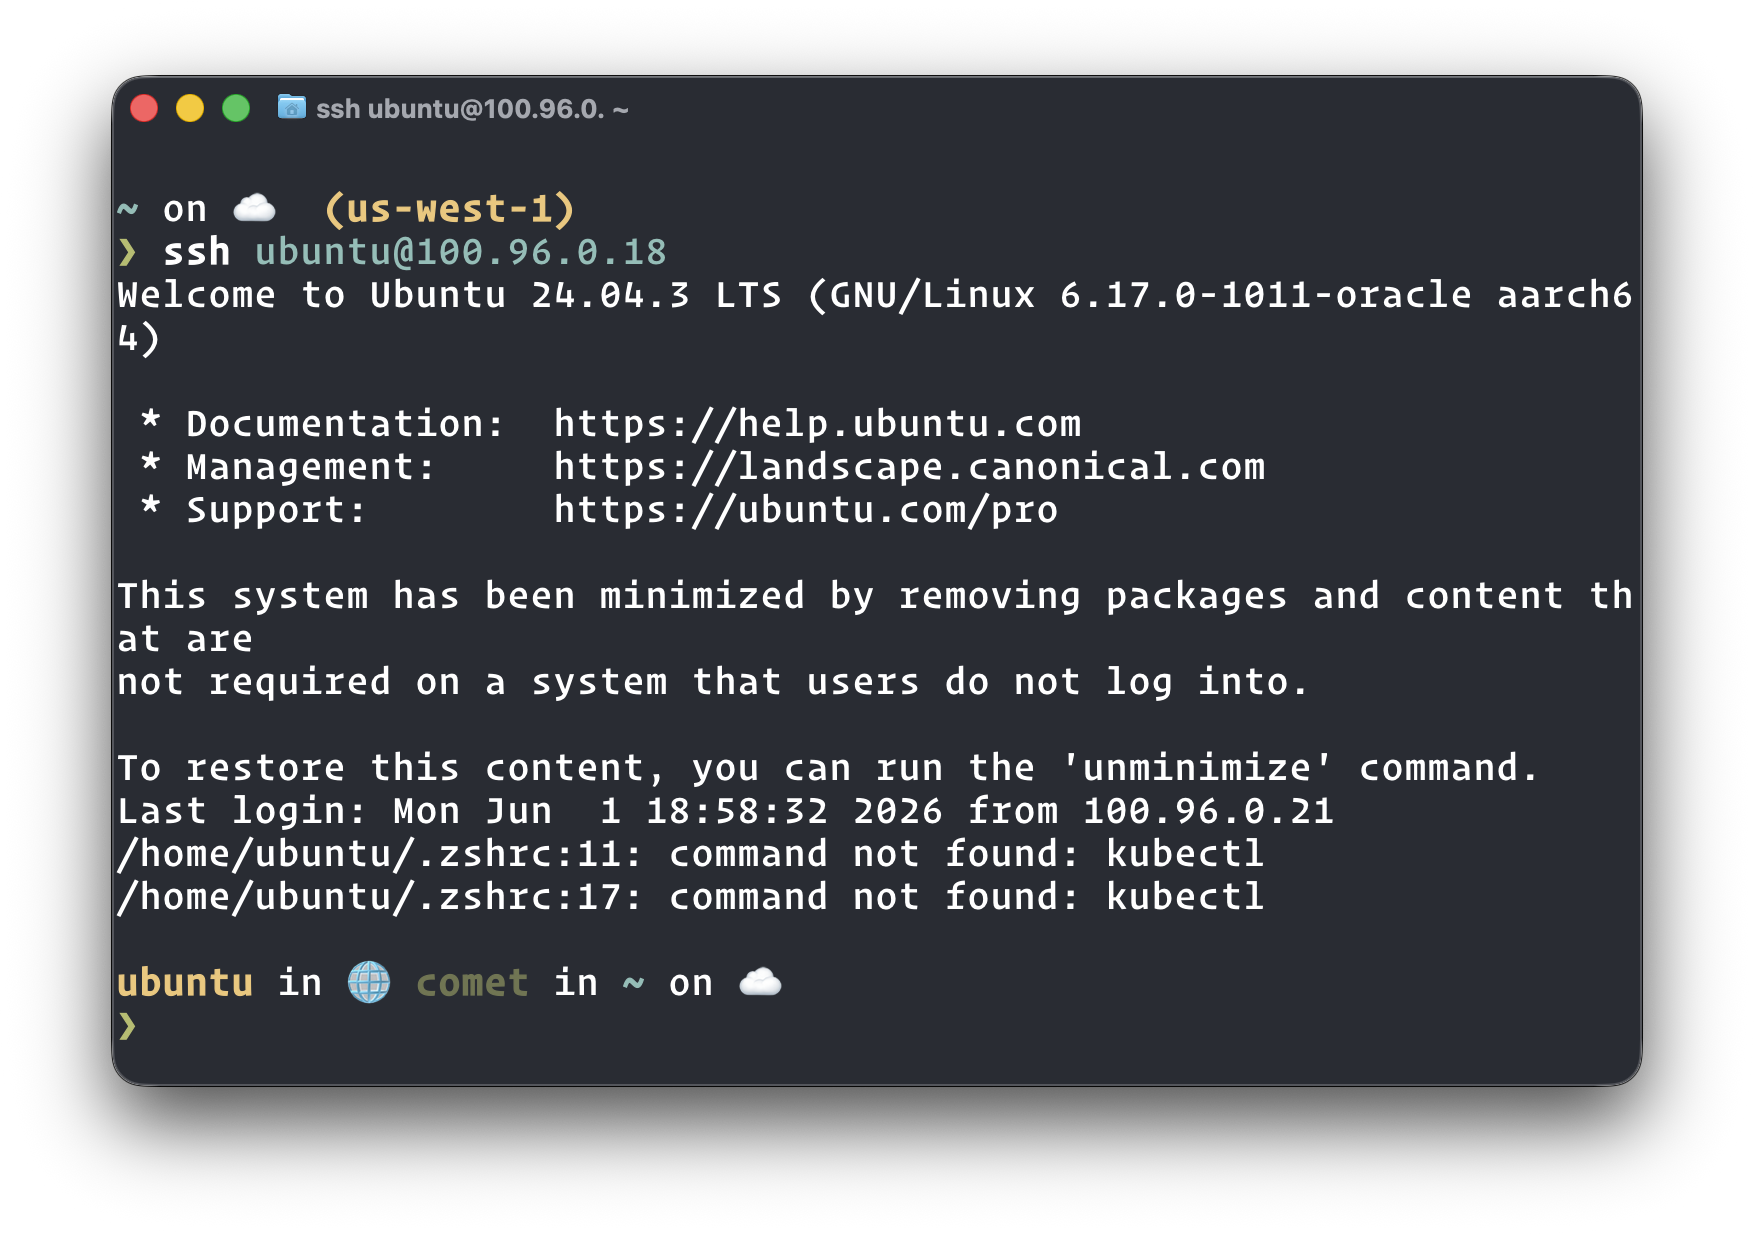
yep!
… and that’s kinda it! It is very simple to get mesh nodes setup.
To mesh or to tunnel?
So if you read to this point you might wonder when to use what.
The way I think about it now is less “which one is better?” and more “what shape of connectivity do I need?”
| Use case | Best fit |
|---|---|
| Access one internal web app via a hostname | Cloudflare Tunnel |
| Publish a private app behind Cloudflare Access | Cloudflare Tunnel |
| SSH into private machines while Warp is connected | Cloudflare Mesh |
| Let servers and devices initiate connections to each other | Cloudflare Mesh |
| Route an internal subnet through a gateway node | Either, depending on directionality |
| Need true direct connections between devices | Tailscale |
| Need custom hostnames, routes, and per-service forwarding | Cloudflare Tunnel |
| Want the simplest private network across devices/services | Cloudflare Mesh |
Well, looking only at the length of each blog post you can already tell that Mesh is much much simpler than Tunnels. It’s also still very new.
If you just want to connect your devices and servers together while the Warp VPN is on, and you don’t care about public routing or hostnames, then Mesh is the much simpler choice. You install it, start Warp, then do <ip>:<port> and you’re done.
Cloudflared has the steeper learning curve, but you can do so much more with it. I have private stuff available on public routes, like n8n.d.sh, hass.d.sh, which will also work when Warp is not connected, I just have to go through Cloudflare Access first. When I’m connected through Warp, this step is fully skipped as a convenience.
In reality, I almost never needed the added bidirectional mesh benefits for my own services. Most of the time I’m exposing one specific thing: Home Assistant, my router, n8n, personal dashboards, and so on. For that, a single unidirectional route is usually the cleaner fit.
(Cloudflare Mesh is also still young and doesn’t support things like magic hostnames yet, but it’s on their roadmap!)
Just use both!
They’re not mutually exclusive and you can of course run cloudflared at the same time as warp-cli. That’s what I’m currently doing while I’m evaluating Mesh.
Even better, they also play nicely with Tailscale, so you can have all 3 installed while you make up your mind what’s the best for you (memo: you need to update iptables for Tailscale to work with Cloudflare Mesh: sudo iptables -I ts-input 3 -i CloudflareWARP -s 100.96.0.0/12 -j ACCEPT).

Happy meshing!